
I’ve used trekking poles through just about every type of terrain you can think of—alpine ridgelines, muddy jungle trails, desert, and the kind of steep, loose rock that challenges you on the trail. And if there’s one thing I’ve learned: when used properly, trekking poles are more than just accessories—they’re essential gear for trekking performance, balance, and joint protection on the trail. This guide isn’t theoretical. It’s built from first-hand use across thousands of trail miles.
Below, I’ll break down the essentials—how to use trekking poles correctly, what adjustments matter, and the technique tweaks that make all the difference on tough terrain.
Why Use Trekking Poles
Do you really need trekking poles? Trekking poles aren’t just for long-distance hikers or older backpackers—they’re for anyone who wants stability on the terrain.
Over thousands of miles, I’ve learned that poles distribute effort away from your lower body and give your upper body something to do—especially useful on steep climbs or long descents. They improve balance on rough terrain and ease pressure on your knees and ankles.
I noticed a consistent hiking rhythm while using trekking poles. In each case, on various terrains, poles helped me hike longer with less fatigue, especially during backpacking and steep trekking.
What Is the Right Trekking Pole Length?
Many new hikers complain that they are not comfortable on the trail with hiking poles. And what I see on the trail is that they hike with just one length—be it uphill, downhill, or on a flat trail.
If you use them wrongly, you will not reap the benefits that poles provide. A poorly adjusted pole can throw off your posture or reduce your power on climbs and descents. That’s why you’ll want to learn what pole length is best for a particular trail type or patch.
The general rule: when standing with the pole tip on the ground, your elbow should form a 90-degree angle. I recommend you buy adjustable poles instead of fixed-length ones. You can buy the best budget trekking poles that are adjustable.
- During Uphill: Shorten your poles slightly to keep your shoulders relaxed and your body forward. A lower grip helps drive you uphill without overreaching.
- During Downhill: Lengthen your poles so they reach the trail surface earlier. This gives you better shock absorption and lets the poles take some of the impact before your knees do.
How to Use Trekking Poles: Best Techniques
Using Wrist Straps
Wrist straps aren’t just for keeping you from dropping your poles—they’re designed to take the strain off your hands and wrists. Slip your hand up through the bottom of the strap loop and then grip the pole handle. This allows the strap to cradle the base of your palm.
And what is the benefit? This way, you can push down on the strap rather than squeeze the grip tightly. I use this method during uphill and downhill hiking to reduce hand fatigue. It helps me save energy to boost my hiking performance.
Walking Rhythm
Using trekking poles efficiently is all about rhythm. Your goal is to mimic your natural walking pattern: right foot forward, left pole forward—just like opposite arms and legs swinging.
It’s not as awkward as you might think. This keeps your stride smooth and maintains balance with a heavy load on your back. When I am on a long hike, this technique helps me move faster and cover more distance with less energy.
Pole Placement
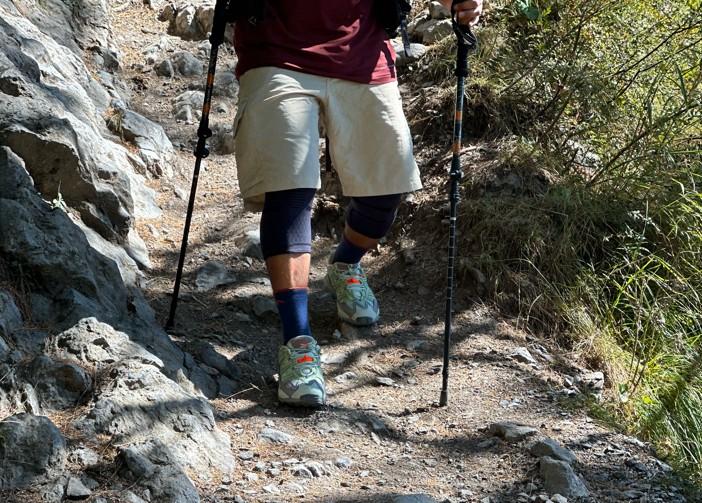
Good pole placement is about timing and control. You want the pole tip to land in sync with or just before your foot hits the ground. Too far ahead and you’ll lose efficiency; too close and you miss out on stability.
On flat trails, plant the pole at a slight angle behind your foot to help propel you forward. On climbs, drive the tips into the slope to gain leverage.

On descents, plant poles just ahead to absorb impact. I learned this technique with experience and consistency.
Don’t worry if you struggle with this technique on your first couple of treks. As you gain a little experience, you will get better at the pole placement technique.
Common Mistakes to Avoid
Even experienced hikers misuse trekking poles. These are the most common I have seen on the trail:
- Gripping too tightly: Death-gripping your poles leads to hand fatigue and tension. Let the straps do the work and keep your grip relaxed.
- Incorrect strap usage: Going in from the top of the loop is a rookie move. Always enter from below so the strap supports your palm—not your wrist.
- Improper pole length adjustments: This is a big one. Too short and you lose efficiency; too long and your posture suffers. Adjust for terrain and body mechanics, not just general rules.
How to Use Trekking Poles Going Downhill
Going downhill is where trekking poles earn their keep. When descending, lengthen your poles slightly—this allows the tips to contact the ground earlier, giving you a wider base and absorbing more impact before it hits your knees.
Plant the poles just ahead of your steps, not directly beneath you. This gives you braking power and added stability, especially on loose scree, mud, or wet leaves.
I face stability challenges especially on steep downhill treks, so instead of coming down straight, I zigzag in such sections. I’ve seen people slipping and falling with a heavy backpack on their back because they use the wrong technique.
Keep your arms slightly bent and shoulders relaxed, letting your poles absorb the shock. Don’t overextend your reach; you want to stay balanced, not leaned back.
On stairs or tight switchbacks, it helps to place both poles in front as a brace before each step down.
You might ask whether to use one or two trekking poles during downhill. I always use both hiking poles with my heavy backpack for extra stability and to protect my knees. With practice, downhill sections become faster, safer, and much easier on the joints.
How to Use Hiking Sticks Uphill
When you’re grinding uphill, trekking poles become a natural extension of your body. Shorten the poles slightly to avoid overreaching and keep your arms close to your body. Plant the tips in sync with your stride but a little closer to your feet than you would on flat ground.
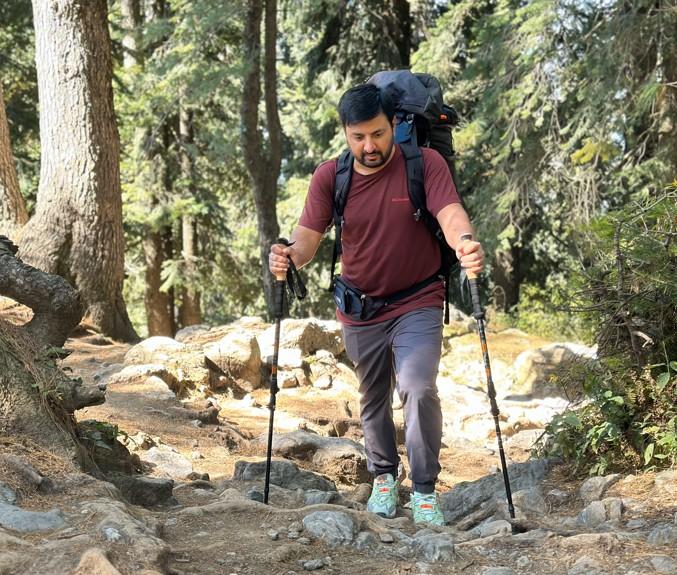
The idea is to use your upper body to push off with each step, taking some load off your quads and glutes. This becomes critical on long climbs or multi-day hikes with weight.
I use this method on switchback-heavy ascents or steep alpine scrambles. This has always helped me keep my momentum without burning out my legs. If you are on loose or rocky ground, firm pole placement can help prevent slips.
How to Use Poles on Flat Ground
Even on relatively flat terrain, trekking poles have a place. Here, the goal shifts from support to propulsion. It’s like Nordic walking.
Keep your elbows at a comfortable 90-degree bend and plant each pole just behind your foot as you walk. This slight backward push increases hiking speed and reduces overall fatigue. I don’t always use poles on flat ground; instead, I attach them to my pack for some hands-free hiking.

However, I have tried this technique for fast hiking and it works well. Keep your grip light and use the straps so your hands aren’t working harder than they need to.
You can maintain a natural walking rhythm—right foot, left pole—and let the poles help with posture and pacing.
Hiking Poles in Snow
Many hiking poles come with snow baskets to hike in the snow. Add snow baskets to keep the tips from punching too deep. I use this setup in fluffy snow and icy trails where snowshoes or microspikes are not enough.
Lengthen your poles slightly to compensate for soft terrain. Plant them with a little extra force. In snow hiking, I don’t just use poles for comfort but also for safety.
How to Use Hiking Poles for Seniors
For older hikers, trekking poles or hiking stick offer both confidence and support on the trail. I have hiked alongside seniors who use them not just for balance but to stay active and independent outdoors.
The key is proper fit—ensure the poles are adjusted to maintain a natural elbow bend without hunching or overreaching.
Seniors enjoy poles with shock-absorbing features and ergonomic grips. I recommend practicing pole use on easy walks or gentle trails before heading into more rugged terrain.
Trekking Poles Tips and Accessories: When to Use
I have swapped out tips and baskets more times than I can count—each tip has a purpose, and it’s worth knowing when to use what.
Pole Tips
- Carbide or steel tips are the standard choice for dirt trails, rocky terrain, and backcountry use. They bite into the ground well and give solid traction.
- Rubber tips are best for pavement and hard-packed surfaces. I use them to reduce noise—otherwise, it can be very annoying for fellow hikers.
Baskets
- Mud baskets are wider than standard tips and help keep your poles from sinking in soft or boggy terrain.
- Snow baskets are essential for winter hiking. They prevent your poles from punching through deep snow.
Advanced Pole Techniques
As your confidence grows and your hikes become more ambitious, trekking poles start to serve more than just basic support. I don’t just use them for trekking but also for various tasks.
Here are a few advanced techniques every serious hiker should know.
Stream Crossings
Crossing water safely is a learned skill, and poles are key. Use them to gauge depth and current strength before stepping in. Plant both poles firmly and cross slowly.
I maintain three points of contact—two poles and one foot—for confidence and stability. With this technique, I have crossed many water streams with ease.
Ultralight Backpacking
For ultralight hikers, trekking poles serve double duty. I use them as tent poles. That way, I don’t have to carry separate tent poles, reducing my pack weight.
Carbon fiber vs. aluminum trekking poles— which one to choose for ultralight backpacking? Go with lightweight carbon or high-grade aluminum poles—they cut down your load.
Conclusion
Used correctly, trekking poles do more than steady your stride—they transform the way you move through the backcountry. Whether you’re tackling steep climbs, navigating snow, or logging long miles with a loaded pack, they add efficiency, reduce fatigue, and boost confidence.
But like any piece of gear, they work best when you know how to use them well. From mastering basic techniques to adopting advanced methods like stream crossings and ultralight tent setups, poles are an adaptable asset for hikers at every level.